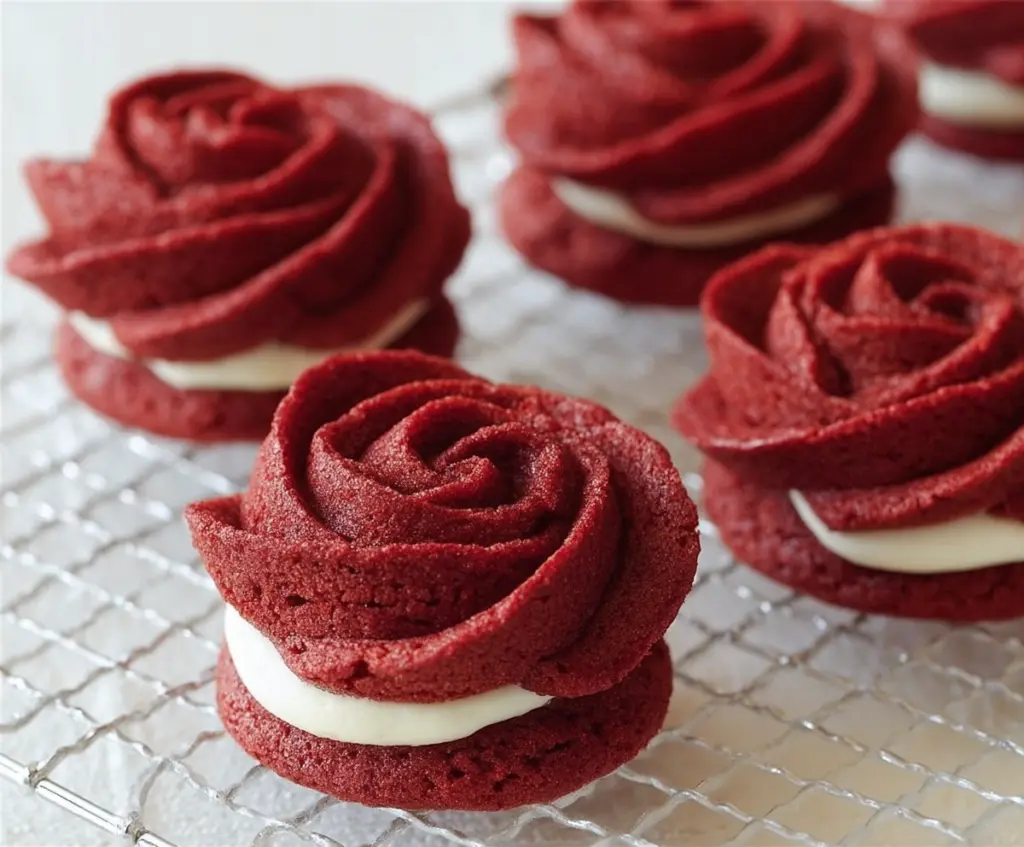
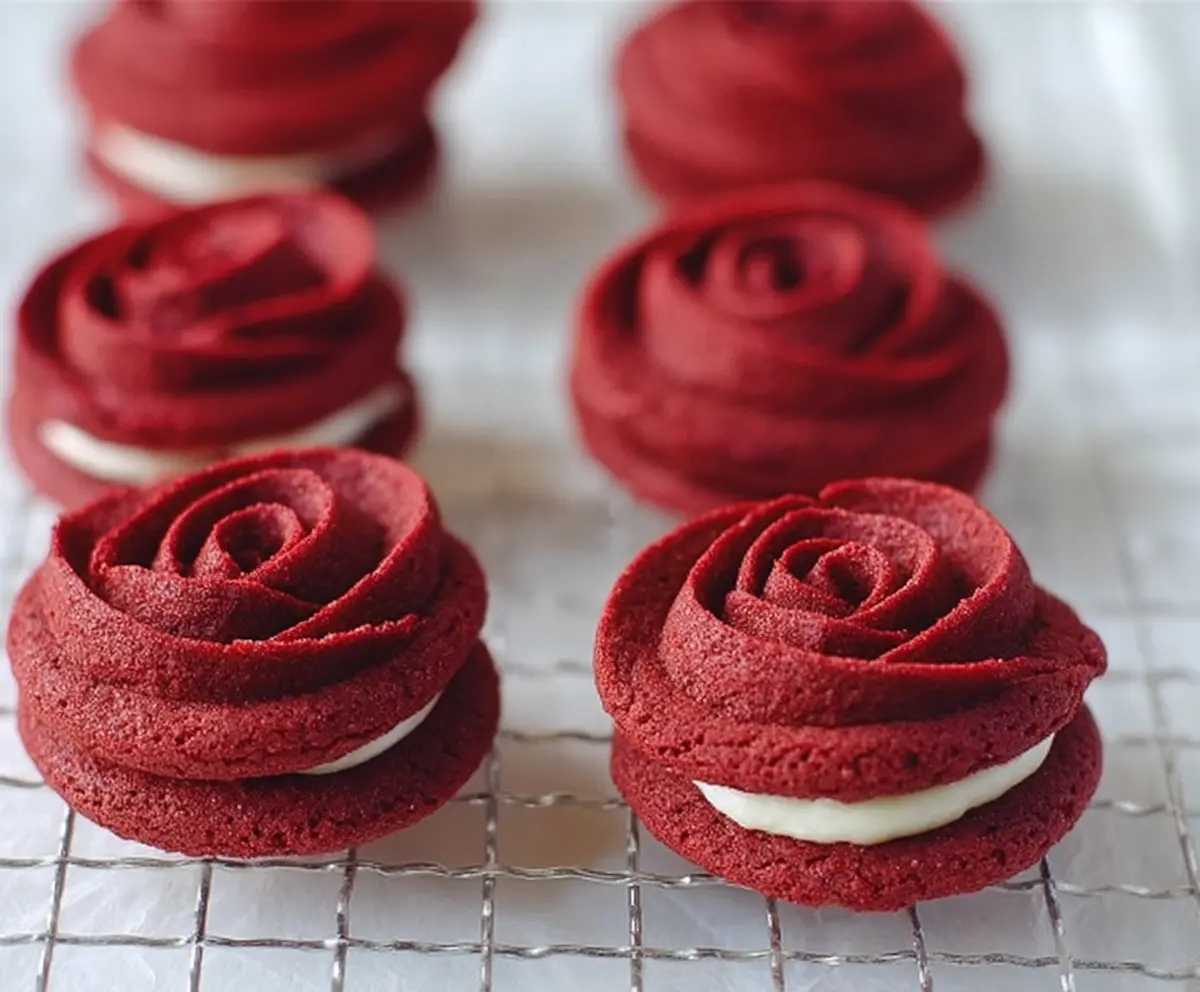
These Red Velvet Rose Sandwich Cookies are a sweet little treat that looks as lovely as they taste. Soft, red velvet cookie layers hug a creamy filling, and the rose shape adds a delicate and charming touch. They’re perfect if you want something pretty to share or to enjoy with a cup of tea or coffee.
I love making these cookies because they bring a smile to everyone’s face—not just from the bright red color, but from how soft and tender the cookies are. The creamy filling is simple but just right, and the rose shape makes them feel special without much effort. If you’re feeling festive or want to surprise someone with a homemade gift, these are a great choice.
My favorite way to enjoy these cookies is fresh from the oven, but they also keep well if you want to make them ahead of time. I’ve found that pairing them with a warm drink, like milk or hot chocolate, really brings out the sweetness and makes the whole experience feel extra cozy. Plus, they’re fun to make with kids or friends because decorating and sandwiching the cookies is just as enjoyable as eating them!
Key Ingredients & Substitutions
All-purpose flour: This gives structure to the cookies. If needed, you can swap with gluten-free flour blends to keep the texture close to original.
Cocoa powder: Unsweetened cocoa adds the subtle chocolate flavor essential in red velvet. Dutch-processed cocoa works well for a smoother taste.
Butter: Softened butter helps make the dough rich and tender. You can try a butter substitute like margarine, but butter gives the best flavor.
Red food coloring: Gel or liquid colors both work, but gel gives more vivid results with less quantity. Beet juice powder is a natural color alternative.
Buttermilk: It adds moisture and tenderness. You can make a quick substitute by adding 1 tablespoon vinegar or lemon juice to 1/4 cup milk and letting it sit for 5 minutes.
Cream cheese filling: Cream cheese and butter blended with powdered sugar make the classic tangy, sweet filling. For a dairy-free option, use vegan cream cheese and plant-based butter.
How Can You Pipe Perfect Rose Shapes for These Cookies?
Piping the rose shape is what makes these cookies so special. Here’s how to get it just right:
- Use a sturdy piping bag with a large open star tip like Wilton 1M or 2D for clean edges.
- Chill your dough well so it holds shape when piped—soft dough can spread too much.
- Start piping from the center of your cookie space and swirl outwards in a spiral to create petal-like layers.
- Keep your hand steady and pipe in one continuous motion if possible for smooth petals.
- If you’re new to piping, practice on parchment paper first to get the feel for the pressure and motion.
This step adds a lovely look to the cookies, making them look fancy without a lot of fuss. Take your time and enjoy watching the rose shapes form!
Equipment You’ll Need
- Mixing bowls – for blending dry ingredients and preparing the filling, I prefer medium-sized bowls for easy handling.
- Electric hand or stand mixer – makes creaming the butter and sugar quick and smooth, saving effort and time.
- Silicone spatula – perfect for scraping down bowls and mixing delicate ingredients gently.
- Measuring cups and spoons – ensures accuracy for baking success, especially with food coloring and liquids.
- Piping bag with large open star tip (like Wilton 1M or 2D) – essential for creating the rose shapes beautifully and neatly.
- Parchment paper or silicone baking mats – helps prevent cookies from sticking and makes cleanup easy.
- Cooling rack – for cooling cookies evenly and preventing them from getting soggy.
Flavor Variations & Add-Ins
- Chocolate chips or chopped nuts: Add them to the dough for some crunch and extra flavor in the cookies.
- Vegan cream cheese and plant-based butter: Use these to make the filling dairy-free while keeping that tangy richness.
- White chocolate or raspberry jam: Swirl into the cream cheese filling for a fruity or sweet-spicy twist.
- Salted caramel sauce: Drizzle inside or on top for a rich, indulgent option.
Red Velvet Rose Sandwich Cookies
Ingredients You’ll Need:
For the Red Velvet Rose Cookies:
- 1 1/4 cups all-purpose flour
- 1/4 cup unsweetened cocoa powder
- 1/2 teaspoon baking powder
- 1/4 teaspoon baking soda
- 1/4 teaspoon salt
- 1/2 cup unsalted butter, softened
- 1 cup granulated sugar
- 1 large egg
- 2 teaspoons vanilla extract
- 1 tablespoon red food coloring (liquid or gel)
- 1/4 cup buttermilk
For the Cream Cheese Filling:
- 4 oz (115g) cream cheese, softened
- 1/4 cup unsalted butter, softened
- 1 to 1 1/2 cups powdered sugar, sifted
- 1 teaspoon vanilla extract
How Much Time Will You Need?
This recipe takes about 20 minutes to prepare, plus 1 hour to chill the dough. Baking and cooling will take another 20-25 minutes. In total, expect roughly 1 hour 45 minutes from start to finish, including assembly.
Step-by-Step Instructions:
1. Mix the Dry Ingredients:
Start by sifting together the flour, cocoa powder, baking powder, baking soda, and salt in a medium bowl. This keeps everything light and evenly mixed. Set this aside for now.
2. Cream Butter and Sugar:
In a large bowl, use a mixer to beat the softened butter and sugar on medium-high speed. Beat for about 3 to 4 minutes, until the mixture is light and fluffy.
3. Add Egg and Vanilla:
Mix in the egg and vanilla extract until everything is combined smoothly.
4. Add the Red Food Coloring:
Stir in the red food coloring, mixing well to get an even color throughout the dough.
5. Combine Dry and Wet Ingredients:
Add the dry ingredients to the wet mixture gradually in three parts, alternating with the buttermilk. Start and end with the dry ingredients. Mix on low speed just until everything comes together — don’t overmix!
6. Chill the Dough:
Cover the dough with plastic wrap and put it in the fridge for at least 1 hour. Chilling makes it easier to pipe and keeps the cookies’ shape while baking.
7. Preheat Oven and Prepare Baking Sheets:
Set your oven to 350°F (175°C). Line baking sheets with parchment paper or silicone mats to prevent sticking.
8. Pipe the Rose Cookies:
Fit a piping bag with a large open star tip (like Wilton 1M or 2D). Fill the bag with the chilled dough. Pipe rose shapes onto your baking sheets by starting in the center and swirling outward to create petal-like layers. Make each cookie about 2 inches across.
9. Bake the Cookies:
Bake for 8 to 10 minutes. Cookies should be set around the edges but still soft in the center. Avoid overbaking to keep them tender.
10. Cool the Cookies:
Let the cookies cool on the baking sheet for 5 minutes, then transfer to a wire rack to cool completely.
11. Prepare the Cream Cheese Filling:
Beat the softened cream cheese and butter together in a bowl until smooth. Gradually add powdered sugar and vanilla extract, mixing until the filling is light and fluffy.
12. Assemble the Cookies:
Once the cookies are cool, pipe or spread the cream cheese filling onto the flat side of one cookie. Gently press a second cookie on top to make a sandwich.
13. Serve or Store:
Enjoy your cookies right away, or store them in an airtight container in the refrigerator. For the best taste and texture, bring them to room temperature before serving.
Can I Use Frozen Dough for These Cookies?
Yes! You can freeze the dough after mixing. When ready to bake, thaw it overnight in the fridge, then chill it again before piping to ensure the best shape.
Can I Substitute Buttermilk?
Absolutely! If you don’t have buttermilk, mix 1/4 cup milk with 1 teaspoon lemon juice or vinegar and let it sit for 5 minutes before using.
How Should I Store Leftover Sandwich Cookies?
Store them in an airtight container in the fridge for up to 4 days. Let them come to room temperature before eating to enjoy the soft texture and creamy filling.
Can I Make These Cookies Ahead of Time?
Yes, you can bake the cookies a day ahead and store them cooled in an airtight container. Assemble the sandwiches just before serving to keep the cookies from getting soggy.