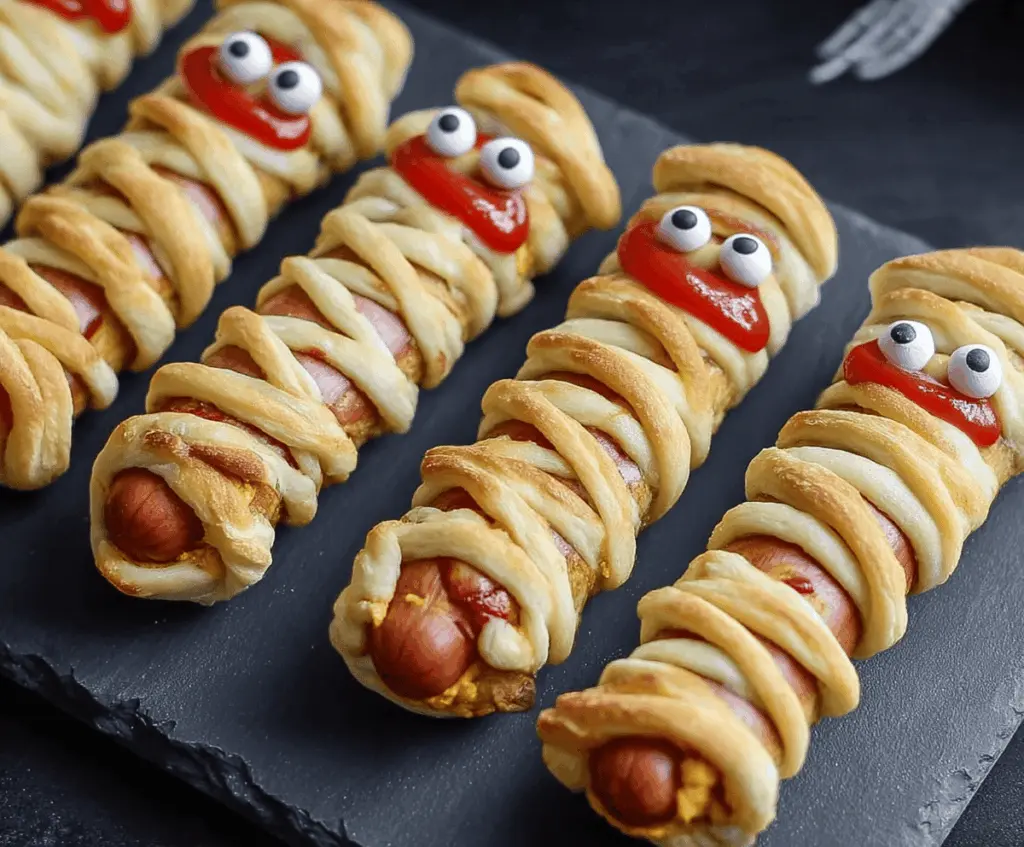
Mummy Hot Dogs are a fun and spooky treat that’s perfect for Halloween or any time you want to add a little silliness to snack time. These are basically hot dogs wrapped in strips of dough to look like little mummies, with cute little eyes peeking out. They’re super simple to make and kids really love how they look and taste.
I always enjoy making these because they’re quick but feel special. Wrapping the dough around the hot dogs is a bit like a miniature craft project, and I like to sneak a little extra cheese inside for a yummy surprise. It’s a great way to get everyone in the kitchen involved—kids especially love adding the eyes, which you can make with tiny dots of mustard or little pieces of olive.
We usually serve these mummies with some ketchup and mustard for dipping, maybe alongside some crunchy veggies or fries. They’re great for parties or just a fun family dinner. Every time I make them, I get a big smile when I see how excited the little ones are to eat their “creepy” hot dogs. It’s a simple recipe that brings a bit of magic and lots of laughs to the table.
Key Ingredients & Substitutions
Hot Dogs: Classic hot dogs work best here, but you can use turkey or veggie dogs to keep it lighter or meat-free. My kids enjoy the regular ones, but veggie dogs make great options if you’re looking to skip meat.
Crescent Roll or Pizza Dough: Crescent roll dough is quick and easy to use, but pizza dough works well too if you want a chewier texture. You can also try puff pastry for a flakier wrap, which tastes great.
Cheddar Cheese (Optional): Adding cheese inside is my favorite twist for extra flavor. Use shredded cheddar or mozzarella, or skip it if you want a simpler bite.
Candy Eyes or Mustard & Pepper: Candy eyes make the mummies look cute and fun. If you can’t find them, a small dab of mustard plus a tiny black pepper or olive slice works just as well to create eyes.
How Can I Wrap Hot Dogs Like Real Mummies without the Dough Tearing?
Wrapping the dough carefully is key to getting that mummy look without tears. Here’s how I do it:
- Cut dough into thin strips, about ¼ inch wide. Thin strips bend easily and wrap better.
- Wrap the strips loosely and in a crisscross pattern. Leaving tiny gaps lets the hot dog peek through, giving that wrapped mummy effect.
- Be gentle when handling the dough to avoid stretching or tearing.
- Tuck the dough ends underneath the hot dog to keep everything in place while baking.
These steps keep the dough from breaking and help your mummies look just right with a nice golden bake.
Equipment You’ll Need
- Baking sheet – I recommend using a rimmed sheet lined with parchment or a silicone mat to keep everything from sticking and make cleanup easy.
- Sharp knife or pizza cutter – helps cut the dough into thin, even strips that wrap smoothly around the hot dogs.
- Small spoon or piping bag (optional) – for adding the candy eyes or small dollops of mustard for the eyes.
- Cooling rack (optional) – to cool the hot dogs slightly after baking without trapping steam, keeping the pastry crisp.
Flavor Variations & Add-Ins
- Use different sausages like turkey, chicken, or veggie dogs to suit dietary preferences or for lighter options.
- Try adding shredded cheese inside the dough or on top before baking for extra gooeyness and flavor.
- Wrap with puff pastry instead of crescent roll dough for a flaky, buttery crust that’s a little richer.
- Dress the faces with a dollop of cream cheese or guacamole instead of ketchup for a fun twist and added taste.
How to Make Mummy Hot Dogs
Ingredients You’ll Need:
- 8 hot dogs
- 1 can (8 oz) refrigerated crescent roll dough or pizza dough
- 4 oz shredded cheddar cheese (optional)
- Ketchup, for decorating faces
- Ready-made edible candy eyes (or small dots of mustard and black pepper for eyes)
Time Needed:
This recipe takes about 15 minutes to prepare and about 12 to 15 minutes to bake. Overall, expect around 30 minutes from start to finish, making it a quick and fun snack or meal.
Step-by-Step Instructions:
1. Prepare Your Oven and Baking Sheet
Start by preheating your oven to 375°F (190°C). Line a baking sheet with parchment paper or a silicone baking mat — this will prevent sticking and make cleanup easier.
2. Get the Hot Dogs Ready
If you want an extra cheesy treat, cut the shredded cheddar cheese into small strips or sprinkle some on each hot dog. This step is optional but adds a nice surprise inside.
3. Wrap the Hot Dogs
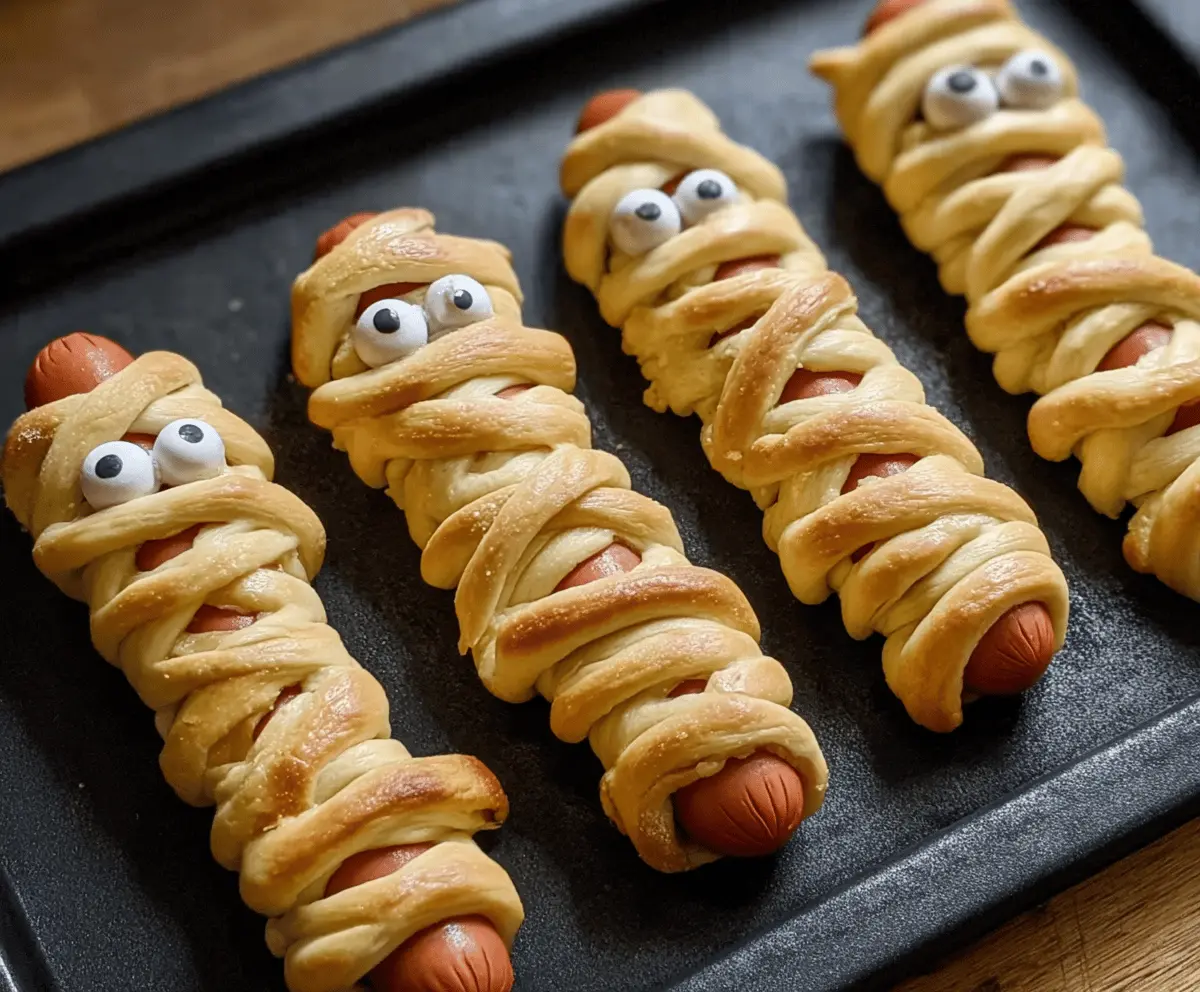
Unroll your crescent roll or pizza dough and cut it into thin 1/4-inch strips. Wrap each hot dog loosely in a crisscross pattern with the dough strips, leaving small gaps so the hot dog can peek through. Don’t forget to tuck the dough ends underneath to keep it secure while baking.
4. Bake the Mummies
Place the wrapped hot dogs on your prepared baking sheet and pop them in the oven. Bake for 12 to 15 minutes until the dough is golden and cooked through.
5. Add the Spooky Faces
Once baked, let them cool just a little bit. Use ketchup near the top exposed part of the hot dog to create a mouth. Then, stick on two edible candy eyes above the mouth. If you don’t have candy eyes, carefully make eyes with tiny dots of mustard and black pepper or small olive pieces.
6. Serve and Enjoy
Your Mummy Hot Dogs are ready to eat! Serve warm with favorite dipping sauces like ketchup, mustard, or ranch dressing for a fun and tasty treat.
Can I Use Frozen Hot Dogs for This Recipe?
Yes, you can! Just make sure to fully thaw the hot dogs in the fridge overnight before wrapping them in dough to ensure even cooking and the best texture.
What Can I Substitute for Crescent Roll Dough?
You can use refrigerated pizza dough or puff pastry instead. Just cut them into thin strips for wrapping. Puff pastry will give a flakier texture, while pizza dough is a bit chewier.
How Should I Store Leftover Mummy Hot Dogs?
Store leftovers in an airtight container in the fridge for up to 2 days. Reheat in the oven or toaster oven at 350°F until warmed through to keep the dough crisp.
Can I Make These Ahead of Time?
Absolutely! Assemble the wrapped hot dogs and keep them covered in the fridge for a few hours before baking. Bake just before serving to keep them fresh and crispy.