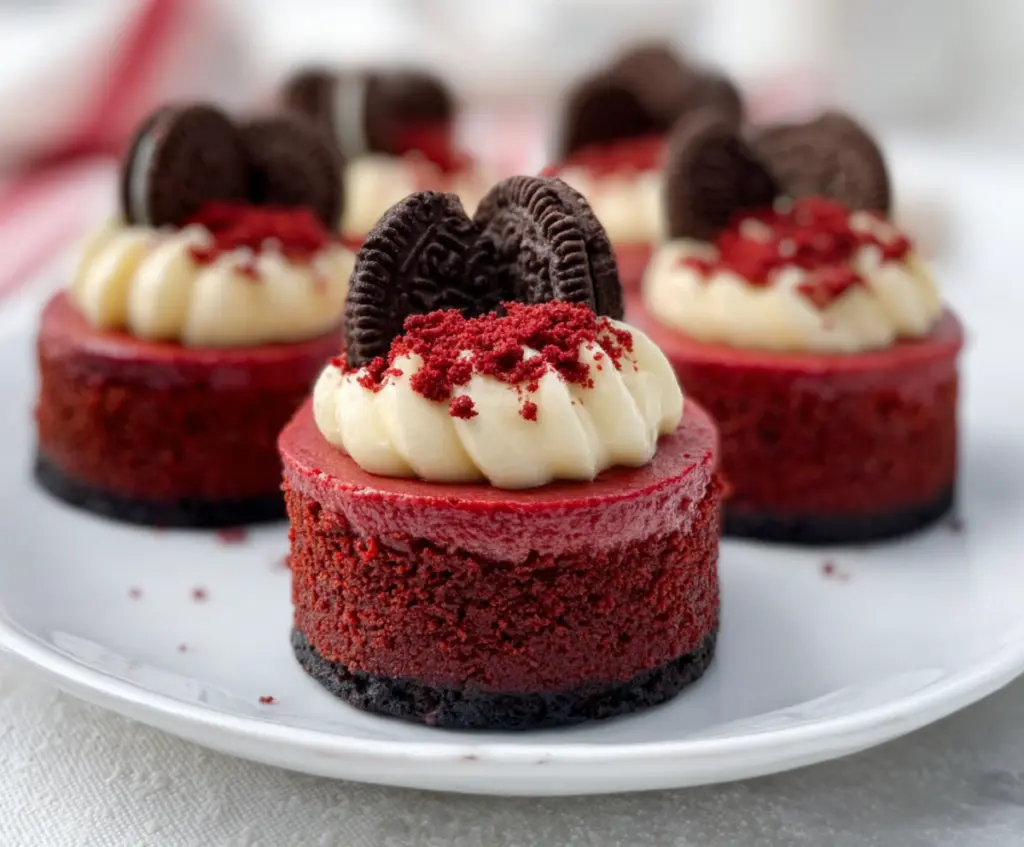
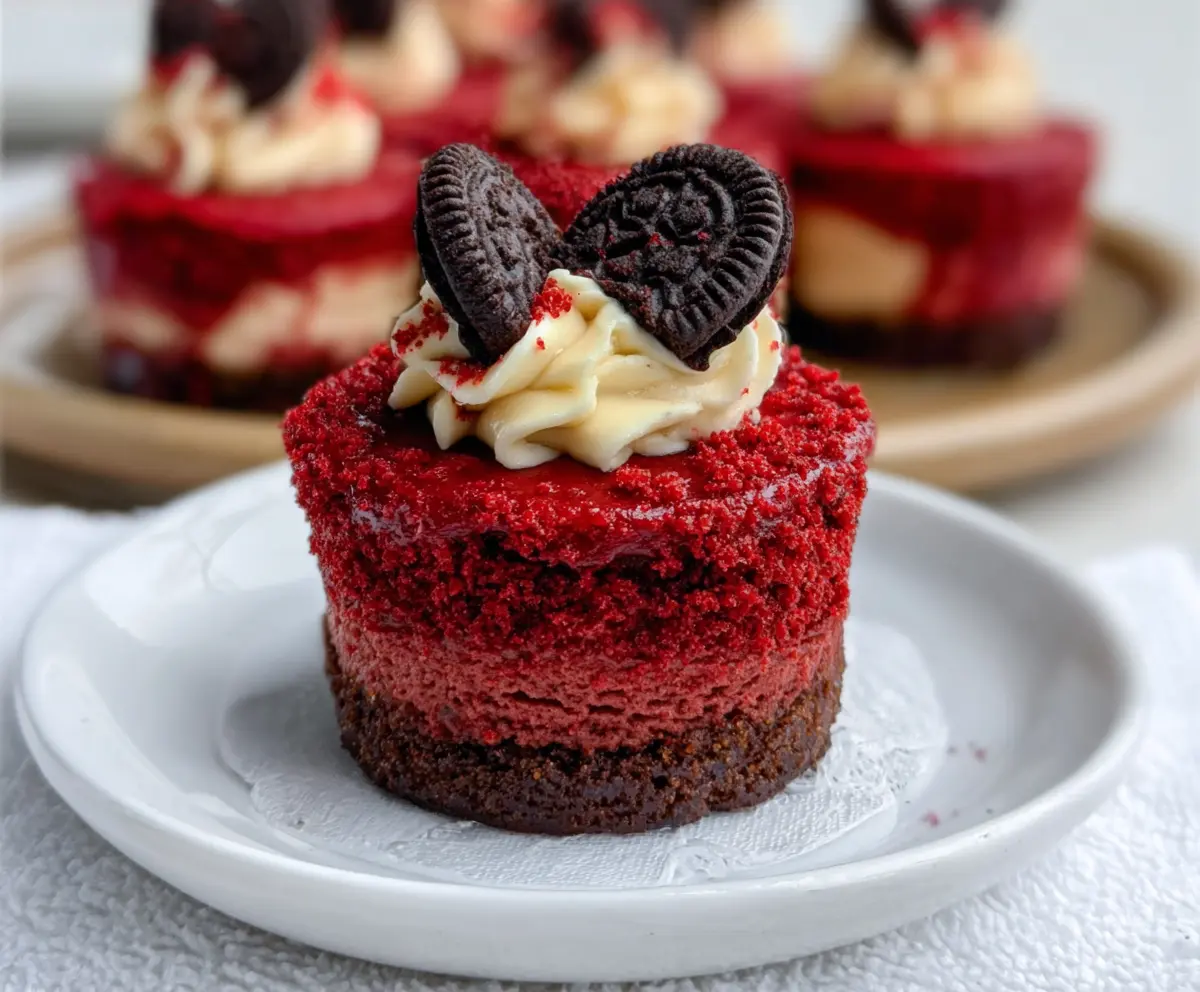
Mini Red Velvet Cheesecakes are little bites of happiness, combining the rich, velvety flavor of classic red velvet cake with the creamy, smooth texture of cheesecake. These cute, individual treats have a perfect balance of sweet and tangy, all wrapped up in a beautiful red color that makes them look as good as they taste.
I love making these mini cheesecakes because they’re just the right size to enjoy without feeling too full, and they’re perfect for sharing at parties or family gatherings. One of my favorite things is how the cream cheese layer melts in your mouth, while the red velvet crumb adds a nice hint of cocoa and just a touch of cocoa bitterness that contrasts so well. Plus, topping them with a dollop of whipped cream makes them even more special.
Whenever I serve these, they usually disappear fast! I like to put them on a pretty plate or in cute cupcake liners to make them even more inviting. They’re great for dessert or even a sweet snack when you want something that feels a little fancy but is super easy to enjoy. Making these mini cheesecakes always puts a smile on my face, and I think they’ll do the same for you.
Key Ingredients & Substitutions
Oreo Cookies: These create a crunchy, chocolatey base that contrasts nicely with the creamy cheesecake. If you want a lighter option, try graham crackers or digestive biscuits mixed with butter.
Cream Cheese: This is the heart of the cheesecake for its rich and smooth texture. Make sure it’s softened to avoid lumps. For a lighter version, try Neufchâtel cheese.
Red Food Coloring & Cocoa Powder: The food coloring gives that classic red velvet appearance, while cocoa powder adds subtle chocolate flavor. If you prefer natural coloring, use beet juice or powder.
Eggs: They bind the cheesecake and help set it while baking. Room temperature eggs beat in easier and give a better texture.
Butter: Used in the crust and frosting for richness. Unsalted is best so you control saltiness. You can swap with margarine if needed.
Powdered Sugar: Makes the frosting smooth and sweet without graininess. If you want to cut sweetness, reduce the amount or try a little honey.
How Do I Get Creamy Cheesecake Batter Without Lumps?
The key is to have all your ingredients at room temperature before you start. Cold cream cheese or eggs can lead to a lumpy batter.
- Soften cream cheese well, either by leaving it out for about an hour or giving it short bursts in the microwave (watch carefully!).
- Beat cream cheese first until very smooth before adding sugar and eggs.
- Add eggs one at a time, mixing well after each to keep batter creamy.
- Mix gently once you add cocoa powder and food coloring—over-mixing can add air and cause cracks later.
Following these steps makes a smooth, creamy batter that bakes into a dense but tender cheesecake.
Equipment You’ll Need
- Mini muffin or cheesecake pan – I find these sizes perfect for making individual cheesecakes that are easy to serve and share.
- Food processor or zip-top bag and rolling pin – handy for crushing Oreos into fine crumbs for the crust.
- Electric mixer or hand whisk – makes beating the cream cheese smooth and creamy without lumps.
- Mixing bowls – for preparing the crust and frosting separately.
- Piping bag or spoon – for decorating the cheesecakes with frosting nicely.
- Measuring cups and spoons – I always keep these handy for precise ingredient amounts.
Flavor Variations & Add-Ins
- Chocolate chips or chunks – fold into the cream cheese batter for extra chocolatey bites.
- White chocolate or peppermint – swap out some of the frosting for a flavored version to match the season or occasion.
- Fresh berries or fruit preserves – add on top or swirl into the batter for a fruity touch.
- Different cookies – try graham cracker or ginger snaps for crust variety and unique flavor combos.
Mini Red Velvet Cheesecake
Ingredients You’ll Need:
For the Oreo crust:
- 18 Oreo cookies (about 1 ½ cups finely crushed, including filling)
- 4 tablespoons unsalted butter, melted
For the cheesecake layer:
- 16 oz (450g) cream cheese, softened
- ½ cup granulated sugar
- 2 large eggs
- 1 teaspoon vanilla extract
- 1 tablespoon cocoa powder
- 2 teaspoons red food coloring
- ½ teaspoon white vinegar
- ½ teaspoon baking soda
For the cream cheese frosting topping:
- 8 oz (225g) cream cheese, softened
- 4 tablespoons unsalted butter, softened
- 1 ½ cups powdered sugar, sifted
- 1 teaspoon vanilla extract
For garnish:
- Red velvet cake crumbs (reserved from trimming or made extra)
- Mini Oreo cookies, halved
Time Needed
This recipe takes about 20 minutes to prep, 20 minutes to bake, plus 1 hour of cooling in the oven. Then, chill the mini cheesecakes refrigerated for at least 4 hours or overnight for best results. Decorating will take about 10 minutes.
Step-by-Step Instructions:
1. Prepare the crust:
Preheat your oven to 325°F (160°C). Crush the Oreo cookies finely, including the filling, using a food processor or by placing them in a bag and crushing with a rolling pin. Mix the Oreo crumbs with melted butter until they look evenly moistened. Press about 1 tablespoon of this mixture into the bottom of each cup in a mini muffin or cheesecake pan, making a firm base. Bake for 5 minutes, then set aside to cool.
2. Make the cheesecake batter:
In a large bowl, beat the softened cream cheese with an electric mixer until smooth and creamy. Add the granulated sugar and beat again until combined. Crack in the eggs one at a time, beating well after each. Stir in the vanilla extract, cocoa powder, red food coloring, white vinegar, and baking soda. Mix gently until the batter is smooth and the color is even.
3. Assemble and bake:
Pour or spoon the cheesecake batter evenly over the Oreo crusts, filling each cup about ¾ full. Bake in the preheated oven for 18-20 minutes, or until the edges are set and the center is still slightly jiggly. Turn off the oven, open the oven door a little, and let the cheesecakes cool inside for about 1 hour. Then transfer them to the refrigerator to chill for at least 4 hours or overnight.
4. Prepare the cream cheese frosting:
Beat the softened cream cheese and butter together until smooth. Gradually add the sifted powdered sugar and continue to beat until the frosting is light and fluffy. Mix in the vanilla extract.
5. Decorate and serve:
Carefully remove the mini cheesecakes from their pans. Pipe or spoon a generous swirl of cream cheese frosting on top of each one. Sprinkle with red velvet crumbs and place a halved mini Oreo cookie as garnish. Serve chilled and enjoy!
Can I Use Frozen Cream Cheese for This Recipe?
It’s best to use cream cheese that has been fully thawed and softened at room temperature. This helps achieve a smooth, lump-free cheesecake batter. If using frozen, thaw it overnight in the fridge and then let it sit out for about an hour before mixing.
How Should I Store Leftover Mini Red Velvet Cheesecakes?
Store leftovers in an airtight container in the refrigerator for up to 3-4 days. For longer storage, you can freeze them for up to 1 month—just thaw in the fridge overnight before serving.
Can I Make These Cheesecakes Ahead of Time?
Absolutely! You can bake and chill the cheesecakes a day ahead. Keep them refrigerated, and add the cream cheese frosting and garnishes just before serving for the freshest look.
What if I Don’t Have Red Food Coloring?
You can use natural alternatives like beet juice or beet powder to add that lovely red hue. Keep in mind that the color may be less vibrant and the flavor slightly different, but it works well as a natural option.