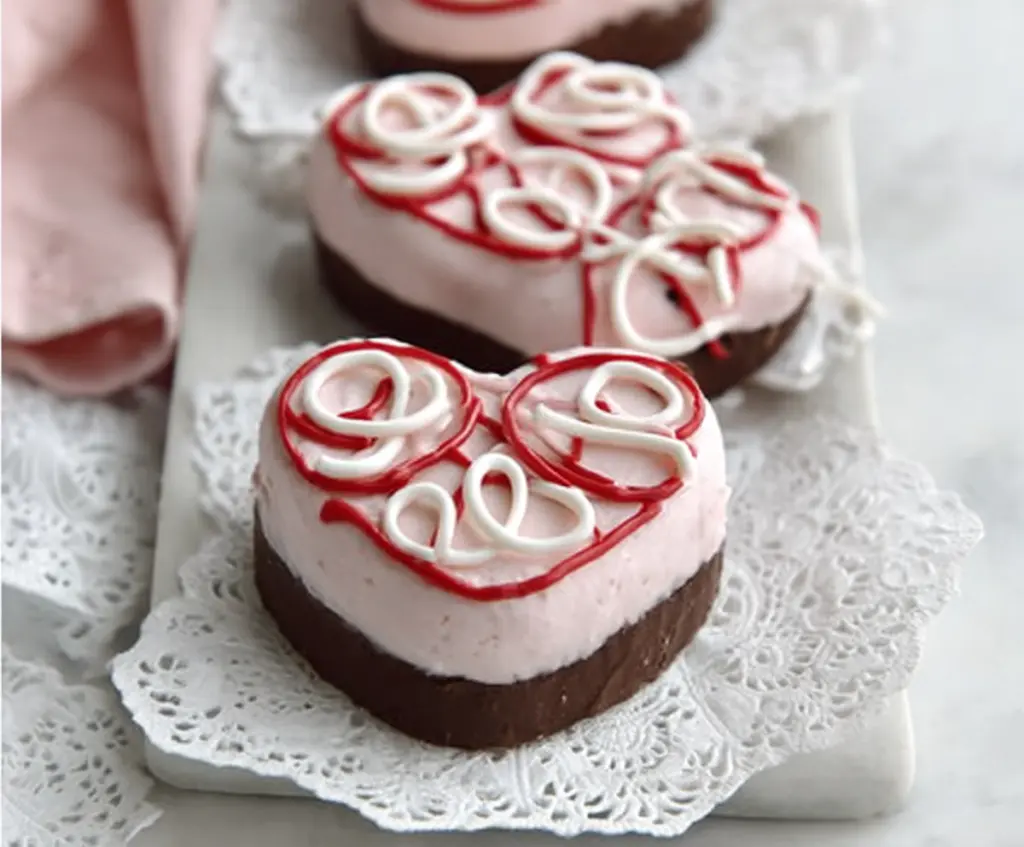
Copycat Little Debbie Valentines Cakes are a sweet treat that brings back all the nostalgic feelings of those classic, tender, red velvet cakes filled with creamy white frosting. These mini delights are perfectly heart-shaped, making them a charming snack to share or enjoy all to yourself, especially around Valentine’s Day when you’re craving something cuddly and sugary.
I love making these homemade versions because they taste just like the original but with extra love and fresh ingredients I can trust. The red velvet cake is soft and moist, and that fluffy cream cheese frosting in the center is just the right kind of sweet and tangy. I find that baking them fresh means they’re even more delightful and a little less packaging, which makes me feel good about grabbing a few for a treat.
My favorite way to enjoy these cakes is chilled from the fridge—something about that cool frosting and rich red velvet texture is so comforting. They’re fun to bring along to a party or to set out as a cute surprise on a Valentine’s dessert table. Plus, making these at home is a nice way to show someone you care with a handmade bit of sweetness.
Key Ingredients & Substitutions
Cocoa Powder: Using unsweetened cocoa powder gives the cake its rich chocolate flavor. If you don’t have cocoa, you can try Dutch-processed cocoa, but reduce baking soda slightly for best rise.
Buttermilk: It keeps the cake moist and tender while adding a mild tang. If you don’t have buttermilk, mix 1/2 cup milk with 1 tsp vinegar and let sit 5 minutes before using.
Heavy Whipping Cream: This is essential for the fluffy pink frosting. For a lighter option, you could try whipped coconut cream, but the taste and texture will differ a bit.
Food Coloring: A few drops of red or pink food coloring give the signature Valentine’s vibe. Gel colors work best as they don’t thin the frosting or batter.
How Can I Make the Perfect Fluffy Pink Whipped Frosting?
Getting the right texture for the pink whipped frosting is key to your cakes. Here’s how to get it perfect every time:
- Chill your mixing bowl and beaters before whipping. Cold tools keep the cream firm longer.
- Add powdered sugar gradually while whipping to avoid a gritty texture.
- Whip cream to soft peaks first, then add food coloring gently to keep the color even.
- Continue whipping until stiff peaks form but be careful not to overbeat or it will turn into butter.
- Keep the frosting cold until assembling to hold its shape and smooth texture.
Equipment You’ll Need
- Mixing bowls – I recommend using a large bowl for whipping cream to get fluffy results.
- Hand or stand mixer – makes whipping the frosting easy and quick, but a whisk works if you’re patient.
- Heart-shaped cookie cutter – perfect for cutting out the cake shapes, adds a cute Valentine’s touch.
- Baking sheet and parchment paper – for baking the chocolate cake evenly without sticking.
- Piping bags and tips – helpful for decorating the icing with neat red and white designs.
- Spatula – great for spreading frosting smoothly over the cake and assembling.
Flavor Variations & Add-Ins
- Use different fillings like strawberry jam or raspberry syrup inside the cakes for a fruity twist.
- Swap the red velvet layer for a classic vanilla or chocolate cake to match your taste.
- Add sprinkles or edible glitter on top of the frosting for extra fun and sparkle.
- Mix in crushed cookies or candies into the frosting for a fun texture and flavor boost.
Copycat Little Debbie Valentines Cakes
Ingredients You’ll Need:
For the Cake:
- 1 cup all-purpose flour
- 1/4 cup cocoa powder (unsweetened)
- 1/2 tsp baking powder
- 1/4 tsp baking soda
- 1/4 tsp salt
- 1/2 cup granulated sugar
- 1/4 cup vegetable oil
- 1 large egg
- 1/2 tsp vanilla extract
- 1/2 cup buttermilk
- 1 tsp white vinegar
- Red food coloring (a few drops, optional for pinkish hue)
For the Pink Whipped Frosting:
- 1 1/2 cups heavy whipping cream, cold
- 1/4 cup powdered sugar
- 1/2 tsp vanilla extract
- Pink food coloring (a few drops)
For the Red and White Icing Decoration:
- 1 cup powdered sugar
- 1 tbsp milk (more as needed)
- 1/2 tsp vanilla extract
- Red food coloring
- White icing (store-bought or homemade with powdered sugar and milk)
How Much Time Will You Need?
This recipe takes about 20 minutes to prepare and 12-15 minutes to bake the cake. Allow about 30 minutes chilling time after assembling before decorating. Overall, plan for approximately 1 hour from start to finish.
Step-by-Step Instructions:
1. Prepare the Chocolate Cake Layer:
Start by preheating your oven to 350°F (175°C). Grease a baking sheet or line it with parchment paper. Sift together the flour, cocoa powder, baking powder, baking soda, and salt in a medium bowl. In a larger bowl, whisk the sugar and oil until well mixed, then add the egg and vanilla, whisking again. Stir in buttermilk, white vinegar, and red food coloring if you’d like a pink tint. Gradually add the dry ingredients to the wet and mix until smooth. Spread the batter evenly on your baking sheet and bake for 12-15 minutes. Once baked, remove and let cool completely on a wire rack.
2. Make the Pink Whipped Frosting:
Chill your mixing bowl and beaters for best results. Pour cold heavy whipping cream into the bowl, add powdered sugar and vanilla extract, then whip until soft peaks form. Gently fold in the pink food coloring until evenly blended. Continue whipping until stiff peaks form. Keep the frosting chilled until you’re ready to assemble.
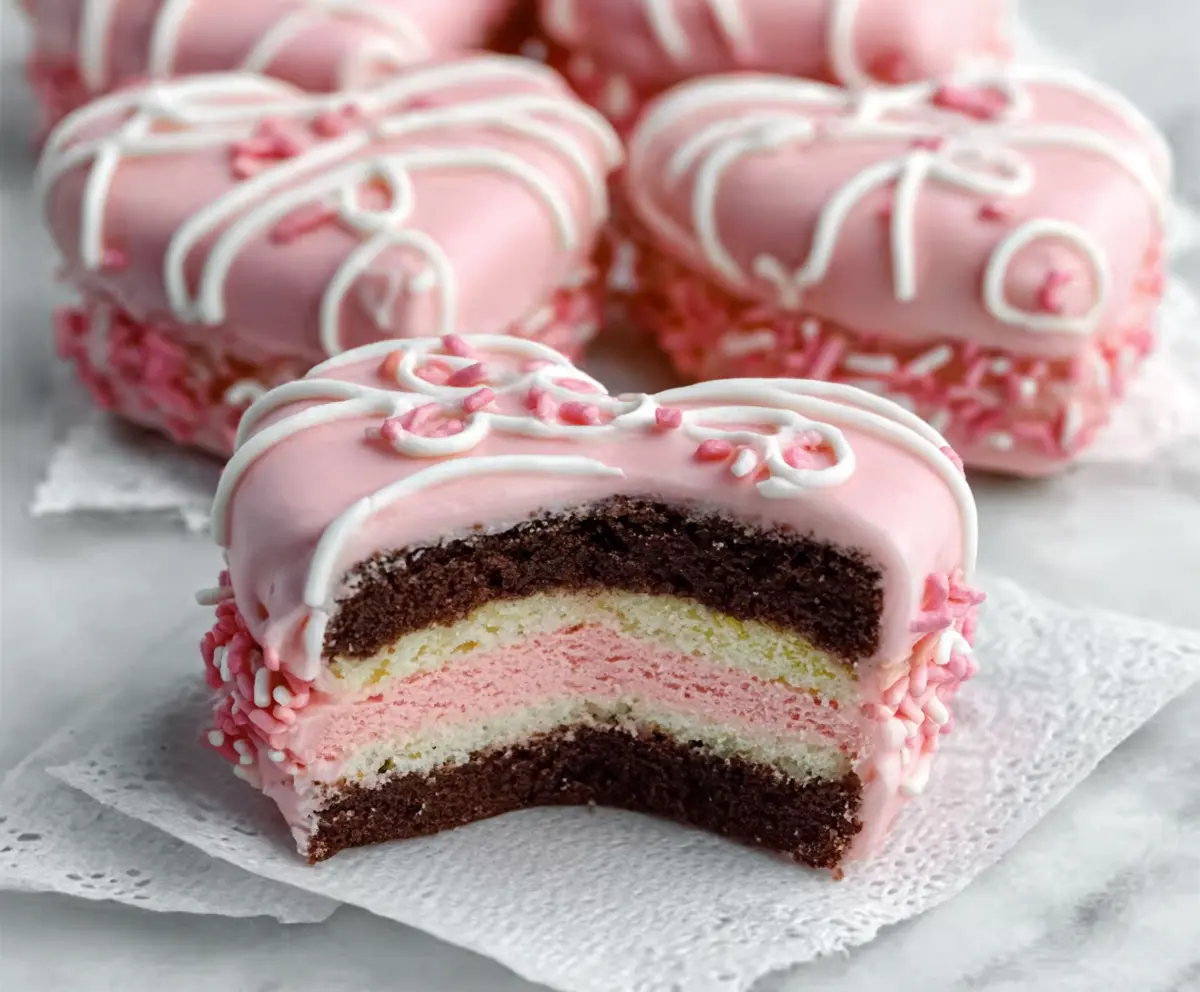
3. Cut and Assemble the Cakes:
Use a heart-shaped cookie cutter to cut hearts out of your cooled cake. Take two heart shapes, spread or pipe a generous layer of the pink whipped frosting on one flat side, then press the second heart on top, making a sandwich. Be gentle so the frosting doesn’t squeeze out too much.
4. Coat the Cakes:
Optionally, frost the sides of your cakes lightly with the pink whipped frosting for a smooth finish. Place the cakes in the fridge and chill for about 30 minutes to help them set.
5. Prepare Icing for Decoration:
Mix powdered sugar, milk, and vanilla extract in a small bowl until you have a thick but pipeable icing. Divide it into two parts—color one with red food coloring and leave the other white. Place each icing into its own piping bag for decorating.
6. Decorate:
Pipe red icing around the edge of each heart-shaped cake and create whimsical swirl patterns on top. Use the white icing to add loops and curls over or around the red designs for a pretty ‘love letter’ style effect. Once decorated, keep the cakes refrigerated until you’re ready to enjoy.
Enjoy your homemade Copycat Little Debbie Valentines Cakes nice and chilled for the softest, sweetest treat!
Can I Use a Different Shape Instead of a Heart?
Absolutely! While heart shapes fit the Valentine’s theme perfectly, you can use any cookie cutter shape you like. Just make sure the size works well for sandwiching with the frosting.
How Should I Store Leftover Valentines Cakes?
Store any leftovers in an airtight container in the refrigerator for up to 3 days. Keep them chilled to maintain the whipped frosting’s texture and freshness.
Can I Make the Cakes Ahead of Time?
Yes! You can bake and assemble the cakes a day ahead, then refrigerate them overnight. Decorate just before serving to keep the icing looking fresh and vibrant.
What Can I Use If I Don’t Have Buttermilk?
No problem—just mix 1/2 cup milk with 1 teaspoon white vinegar or lemon juice and let it sit for 5 minutes. This homemade buttermilk substitute works just as well in the cake batter.