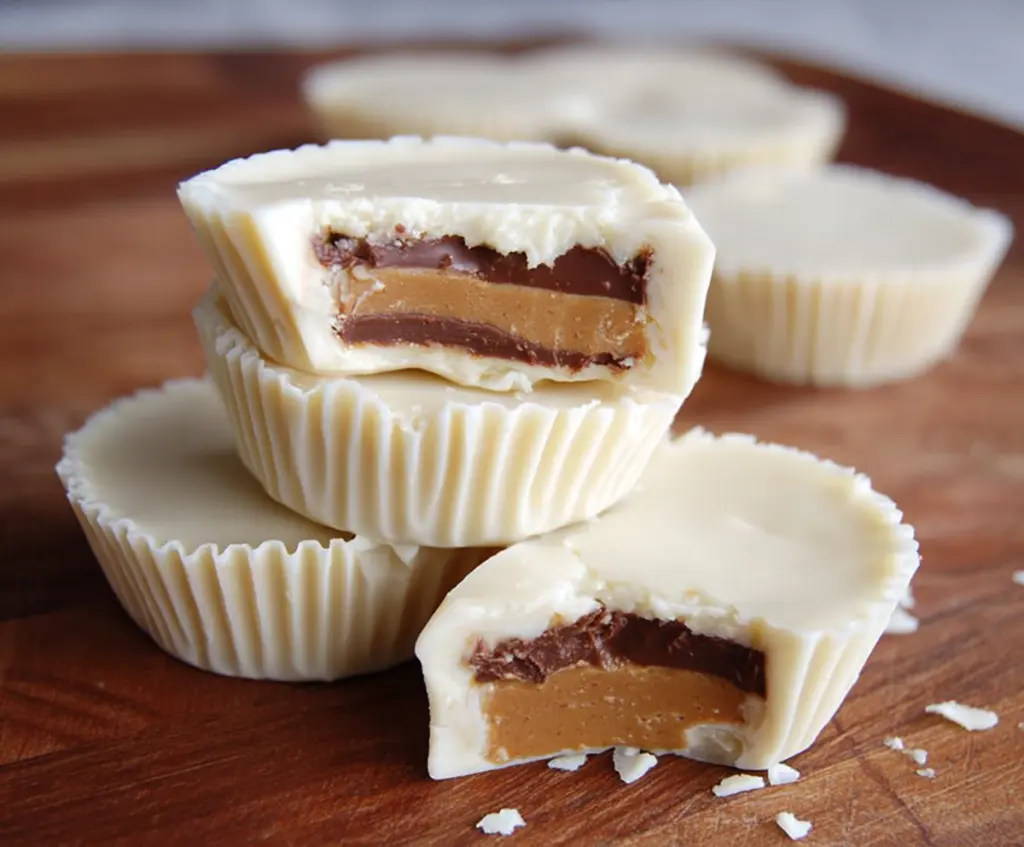
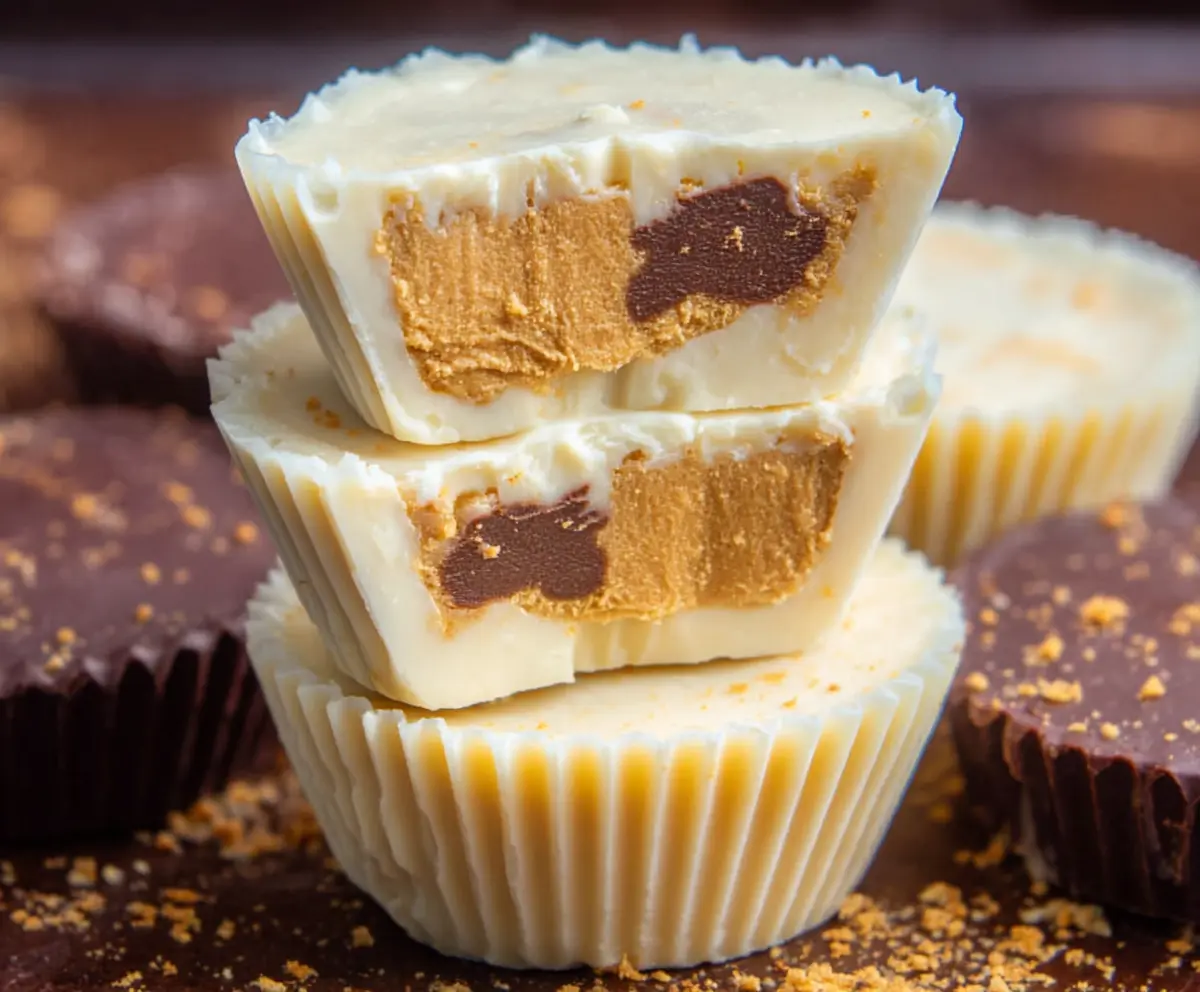
White Chocolate Peanut Butter Cups are a sweet treat that combines creamy white chocolate with rich, smooth peanut butter in every bite. These little cups are perfect if you love that classic peanut butter and chocolate combo but want a twist with the white chocolate’s gentle sweetness and silky texture.
I love making these because they’re surprisingly easy to put together, and everyone seems to enjoy them no matter the occasion. I usually make a batch when I want a quick homemade treat that feels a little fancy but doesn’t take all day. Plus, I find it fun to customize the peanut butter filling—sometimes a bit saltier, sometimes sweeter, depending on my mood.
These peanut butter cups are perfect for sharing with friends or as a special snack when you need a little pick-me-up. I like to keep some in the fridge so they stay firm and refreshing, especially on warm days. They always bring a smile, and I’ve found they make great homemade gifts too!
Key Ingredients & Substitutions
White Chocolate: This is the base for your cups. Use good quality white chocolate chips or chopped bars for smooth texture and rich flavor. If you can’t find white chocolate, try white candy melts, but they might be a bit sweeter and less creamy.
Peanut Butter: Creamy peanut butter works best here for a smooth filling. If you prefer chunky peanut butter for a bit of crunch, go ahead! For allergies or preferences, almond or sunflower seed butter are great alternatives.
Powdered Sugar & Butter: These add sweetness and richness to the filling. You can swap powdered sugar with coconut sugar powder for a different sweetness level, but it might slightly change the texture.
Semisweet Chocolate (optional): Adding this layer gives a nice contrast between white chocolate and peanut butter. If you want an easier version, skip this or use milk chocolate chips instead.
How Do I Get a Smooth and Firm Chocolate Shell?
The chocolate shell needs patience to set well and look neat. Here’s what works for me:
- Use a microwave or double boiler to melt the chocolate slowly, stirring often. This avoids burning or seizing.
- Pour the melted white chocolate into each liner and spread it evenly, making sure it covers the sides a bit.
- Pop the tray in the fridge for about 10 minutes to harden the shell before adding your filling.
- Adding layers cold helps the cups hold their shape and prevents the peanut butter from mixing into the chocolate.
- Once filled and topped, chill the cups again for at least 30 minutes to firm up fully.
By following these steps, you’ll get cups that look tidy and taste great, with perfectly crisp white chocolate on the outside and creamy peanut butter inside.
Equipment You’ll Need
- Mini muffin pan or cupcake tin – I use this to give the cups their shape and keep everything neat.
- Paper cupcake liners – make cleanup easier and give the cups a pretty finish.
- Microwave-safe bowl or double boiler – for melting the white chocolate smoothly without burning.
- Spoon or small spatula – helps spread the melted chocolate evenly in the liners.
- Mixing bowl – for preparing the peanut butter filling.
- Measuring spoons and cups – to keep the ingredients just right.
Flavor Variations & Add-Ins
- Try adding a splash of vanilla or almond extract to the peanut butter filling for extra flavor.
- Mix in chopped nuts or crushed pretzels into the peanut butter for texture and crunch.
- Swirl in some raspberry or caramel sauce on top before the final layer of chocolate for a fruity or sweet twist.
- Use dark or milk chocolate instead of white to change the look and taste, or add a pinch of chili powder for a spicy kick.
How to Make White Chocolate Peanut Butter Cups
Ingredients You’ll Need:
- 2 cups white chocolate chips or chopped white chocolate
- 1/2 cup creamy peanut butter
- 1/4 cup powdered sugar
- 1 tablespoon unsalted butter, softened
- 1/2 teaspoon vanilla extract
- 1/4 teaspoon salt (optional, enhances peanut butter flavor)
- 1/2 cup semisweet chocolate chips (optional, for middle layer)
How Much Time Will You Need?
This recipe takes about 10 minutes to prepare, with extra time for chilling—about 10 minutes for the chocolate shells to set and at least 30 minutes after assembling, so plan for around 50 minutes total including chilling.
Step-by-Step Instructions:
1. Prepare Your Pan and Melt the White Chocolate:
Line a mini muffin pan or cupcake tin with paper liners. In a microwave-safe bowl, melt the white chocolate chips in 30-second bursts, stirring well in between until smooth and creamy.
2. Make the White Chocolate Bottom Layer:
Spoon about a tablespoon of melted white chocolate into each paper liner. Use the back of the spoon to gently spread the chocolate so it covers the bottom evenly, creating a solid base. Refrigerate the pan for around 10 minutes until these shells harden.
3. Mix the Peanut Butter Filling:
While the white chocolate sets, combine the peanut butter, powdered sugar, softened butter, vanilla extract, and salt in a bowl. Stir until the mixture is smooth, creamy, and well combined.
4. Add Optional Semisweet Chocolate Layer:
If you want a middle chocolate layer, melt the semisweet chocolate chips in the microwave as you did with the white chocolate. Once the white chocolate bottoms are firm, spoon about a teaspoon of semisweet chocolate over each, then add a rounded tablespoon of peanut butter filling on top.
5. Finish with More White Chocolate:
Cover each cup with the remaining melted white chocolate, making sure the peanut butter filling is sealed inside. You can spread the chocolate gently with the back of a spoon for an even top.
6. Chill and Set:
Place the filled cups back into the refrigerator for at least 30 minutes or until completely firm. Once set, remove from the paper liners and store in an airtight container in the fridge. These treats keep well for up to two weeks!
Can I Use Natural Peanut Butter Instead of Creamy Peanut Butter?
Yes, you can! Just be aware that natural peanut butter is usually thinner and oilier, so you might want to chill it a bit before mixing to help the filling firm up better.
What’s the Best Way to Store These Peanut Butter Cups?
Store them in an airtight container in the refrigerator to keep the white chocolate firm and prevent melting. They should last up to two weeks when kept chilled.
Can I Make These Ahead of Time?
Absolutely! You can prepare the cups a day or two in advance and keep them refrigerated. Just bring them to room temperature for a few minutes before serving if you prefer a softer bite.
Can I Skip the Semisweet Chocolate Layer?
Yes, the semisweet chocolate is optional. Skipping it will still give you delicious white chocolate peanut butter cups, just without the extra chocolate layer in the middle.