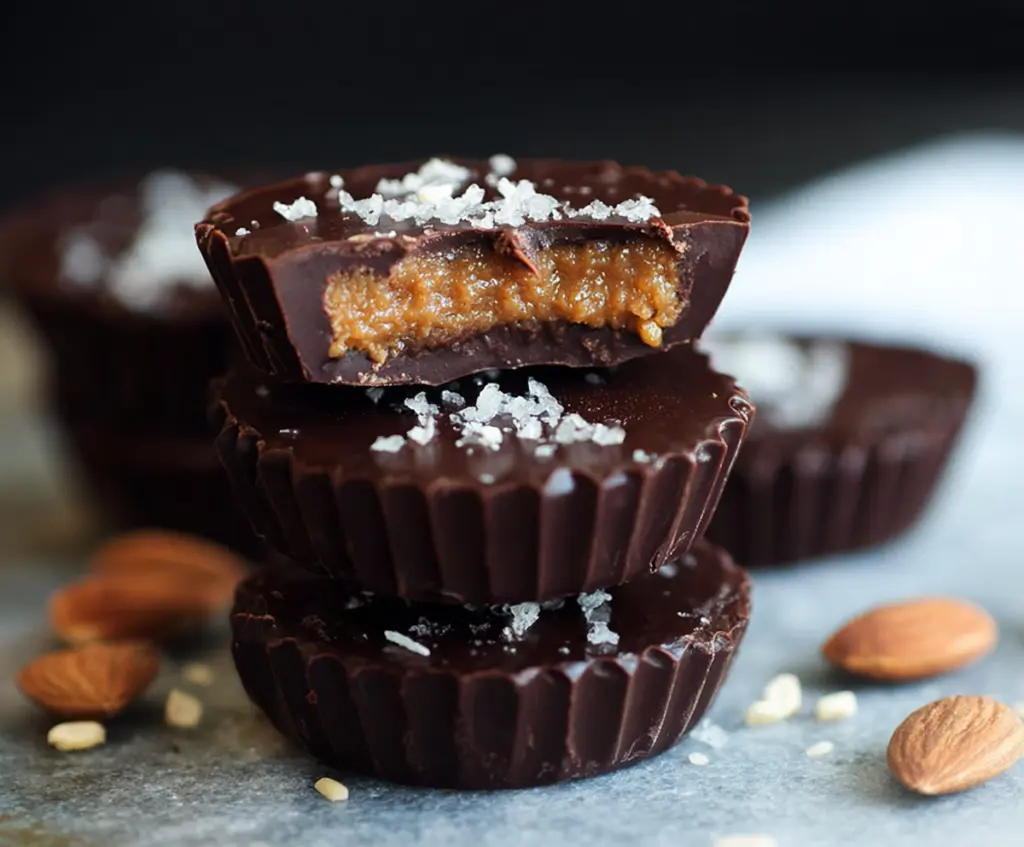
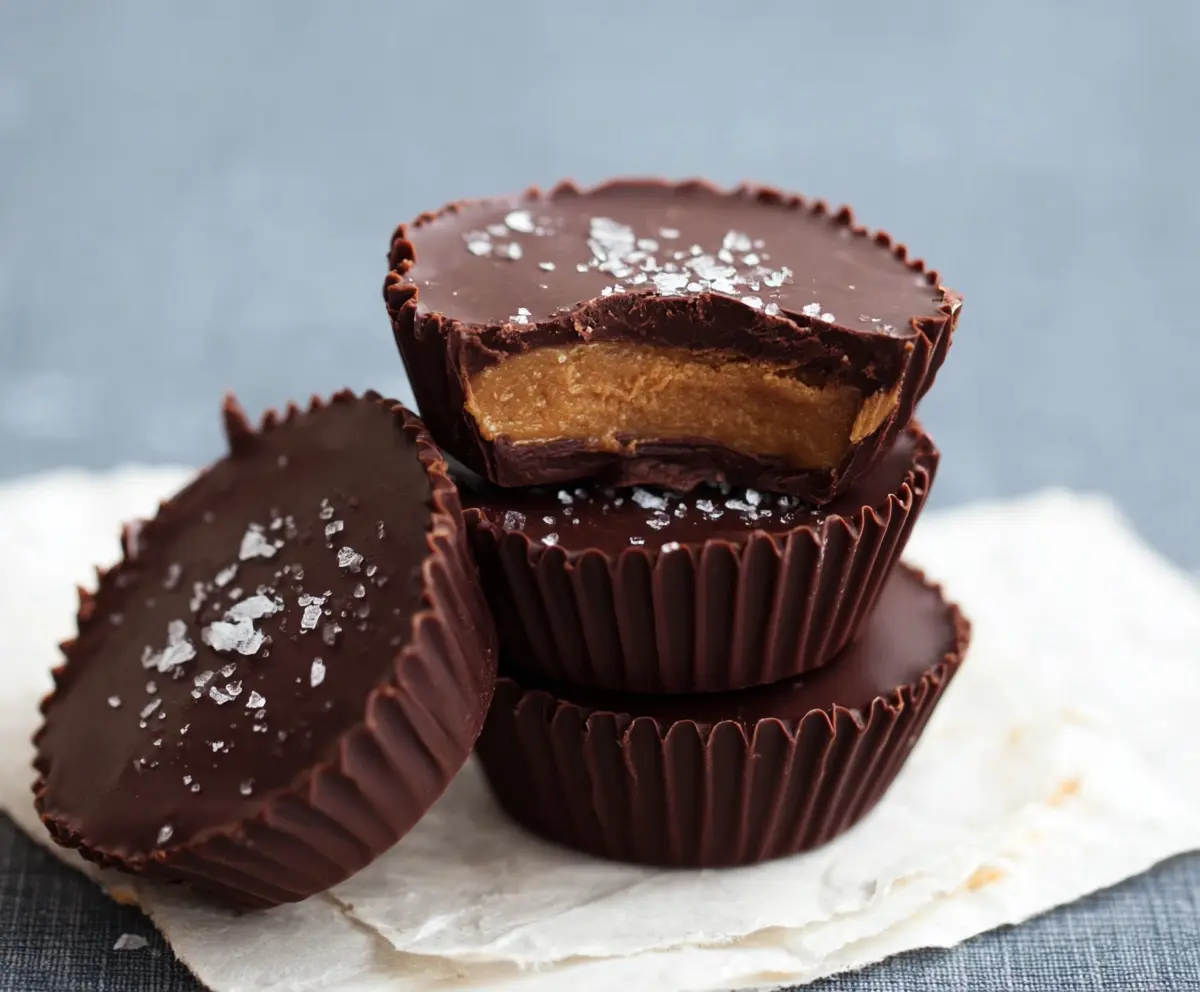
Dark Chocolate Almond Butter Cups are little treats that bring together the rich, slightly bitter taste of dark chocolate with the creamy, nutty sweetness of almond butter. These cups are smooth and satisfying, with a perfect balance of chocolate and almond that feels a bit fancy but is really simple to make.
I love making these when I want a chocolate fix that doesn’t feel too heavy or overly sweet. The almond butter adds a nice twist that keeps them interesting, and I find that a sprinkle of sea salt on top really makes all the flavors pop. These cups always disappear fast whenever I share them with friends and family!
My favorite way to enjoy these is straight from the fridge, when they’re firm and have that wonderful snap when you bite in. They make a great little snack for a mid-afternoon pick-me-up or a sweet finish to a meal. I promise, once you try making these at home, you’ll keep coming back to this recipe again and again.
Key Ingredients & Substitutions
Dark chocolate: Using chocolate with 70% cocoa or higher gives a nice balance of rich and slightly bitter flavor that pairs wonderfully with almond butter. If you prefer sweeter, try 60% cocoa or mix in some milk chocolate for a milder taste.
Almond butter: Smooth almond butter works best for a creamy texture, but crunchy adds a nice crunch if you like a bit of texture. You can swap almond butter for peanut butter or cashew butter if you want a different nutty flavor.
Sweetener: Powdered sugar is optional for a little extra sweetness, but maple syrup is a great natural substitute. You could omit sweetener completely if you like your cups less sweet or use honey instead.
Vanilla extract: Just a splash of vanilla brightens the almond butter filling. If you don’t have vanilla, a pinch of cinnamon or almond extract can add a fun twist.
Flaky sea salt: Sprinkling sea salt on top creates a perfect contrast to the sweet and bitter flavors. If you don’t have flaky salt, regular kosher salt works, but use less so it’s not overpowering.
How Do You Get Smooth, Shiny Chocolate that Sets Perfectly?
Melting and setting chocolate can be tricky, but here’s an easy way to get a smooth, glossy finish on your cups:
- Melt the chocolate slowly in a double boiler or microwave in short, 30-second bursts to avoid burning.
- Stir often to keep the chocolate smooth and even.
- Fill and spread your chocolate layers evenly in the molds for a neat look.
- Chill the cups in the freezer between layers so the chocolate sets quickly and doesn’t mix with the almond butter.
- Let the final set chill fully to harden the outside and create that satisfying snap when you bite in.
Equipment You’ll Need
- Mini muffin tin or silicone mold – I use this because it shapes the cups evenly and makes removing them easy.
- Mixing bowls – helpful for melting chocolate and mixing the almond butter filling.
- Microwave or double boiler – I prefer the double boiler for gentle, even melting of chocolate.
- Spatula or spoons – for spreading the melted chocolate and layering the cups.
- Measuring spoons – perfect for adding consistent layers and toppings.
- Parchment paper or silicone liners – makes cleanup easier and prevents sticking.
Flavor Variations & Add-Ins
- Use peanut butter instead of almond butter for a classic peanut cup flavor.
- Add chopped nuts or dried fruit to the almond butter layer for extra texture.
- Swirl in a bit of caramel or peanut butter into the chocolate layers for a more decadent treat.
- Top with a sprinkle of crushed cookies or a drizzle of white chocolate for decoration and extra flavor.
Dark Chocolate Almond Butter Cups
Ingredients You’ll Need:
For the Chocolate Cups:
- 1 cup dark chocolate chips (70% cocoa or higher)
For the Almond Butter Filling:
- 1/2 cup almond butter (smooth or crunchy)
- 2 tablespoons powdered sugar or maple syrup (optional, for sweetness)
- 1/4 teaspoon vanilla extract
For Topping:
- Flaky sea salt, for sprinkling
How Much Time Will You Need?
This recipe takes about 10 minutes to prepare plus 20-30 minutes for chilling and setting in the freezer. It’s quick to put together but needs some time for the chocolate to firm up perfectly around the almond butter filling.
Step-by-Step Instructions:
1. Prepare the Baking Molds:
Line a mini muffin tin or silicone mold with paper liners or lightly grease to prevent sticking. This will make it easier to remove the cups once set.
2. Melt the Chocolate:
Gently melt the dark chocolate chips using a double boiler or microwave them in 30-second bursts, stirring well between each, until the chocolate is smooth and glossy.
3. Form the Chocolate Base:
Spoon about 1 teaspoon of melted chocolate into each muffin cup. Use the back of the spoon to spread it evenly on the bottom and a bit up the sides. Put the tray in the freezer for 5 to 10 minutes so the chocolate hardens.
4. Mix the Almond Butter Filling:
While the chocolate sets, combine the almond butter with powdered sugar or maple syrup (if using) and vanilla extract. Stir until the mixture is smooth and creamy.
5. Add the Almond Butter Layer:
Take the chocolate bases out of the freezer. Add about 1 teaspoon of the almond butter mixture onto the center of each chocolate base. Gently press down, leaving some space around the edges for the top layer of chocolate.
6. Seal with Chocolate:
Cover each almond butter-filled cup with another teaspoon of melted chocolate. Smooth the top to seal the filling inside.
7. Add a Finishing Touch:
Sprinkle a little flaky sea salt on top of each cup. This adds a lovely flavor contrast and looks inviting.
8. Chill to Set:
Return the cups to the freezer for 15 to 20 minutes, or until the chocolate is completely firm.
9. Store and Enjoy:
Remove the cups from the molds and keep them in an airtight container in the refrigerator or freezer. They’re best eaten chilled and enjoyed as a sweet treat anytime you want!
Can I Use Peanut Butter Instead of Almond Butter?
Absolutely! Peanut butter works great as a substitute and gives a classic flavor. Just use the same amount and adjust sweetness to your taste if needed.
How Should I Store These Almond Butter Cups?
Store them in an airtight container in the refrigerator for up to two weeks or in the freezer for longer storage. Let them thaw slightly before eating for the best texture.
Can I Make These Ahead of Time?
Yes! These cups keep well and actually taste better after sitting a day or two, allowing flavors to meld. Just keep them chilled and covered.
What If I Don’t Have Flaky Sea Salt?
You can use regular kosher salt or skip the salt altogether. If using regular salt, sprinkle lightly as it’s more concentrated and can easily overpower the flavors.